
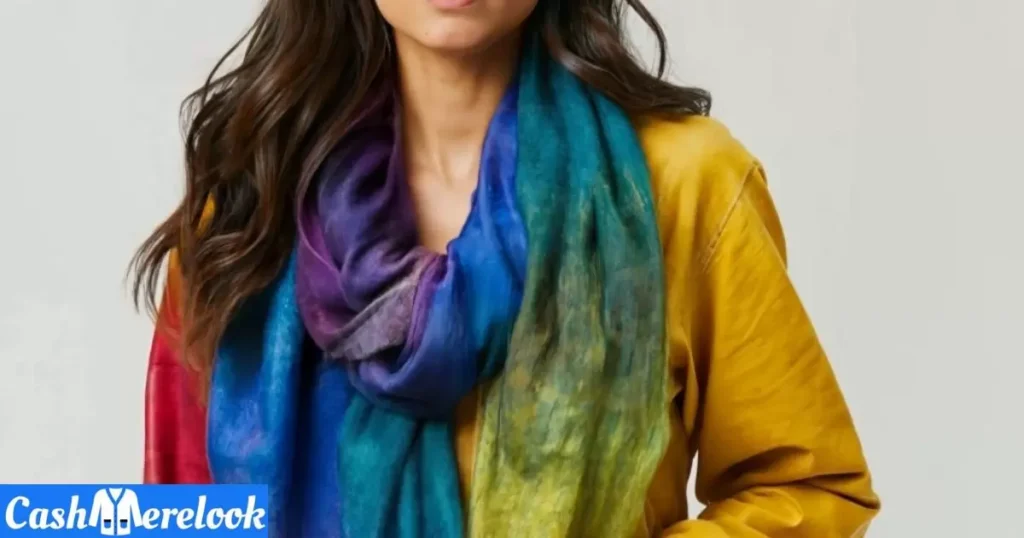
Dye cashmere is a delightful, creative process, transforming garments with a personal touch. Enhance or change colors, breathing new life into cherished pieces. Cashmere, celebrated for softness and warmth, becomes a canvas for vibrant hues.
Unlock the art of dyeing cashmere and add a unique touch to your wardrobe. Wondering, “Can you dye cashmere?” Delve into the process, offering a chance to breathe new life into your favorite pieces. This transformative journey reveals the creative possibilities of enhancing the color of your cashmere garments with helpful tips and insights.
Dye cashmere requires attention and understanding of the fabric’s delicate nature. Choose the right dye and preserve texture with our insightful tips. Transform your wardrobe into a personalized masterpiece with the art of dyeing cashmere.
Materials
| Materials and Tools | Details |
| Cashmere Garment or Fabric | Make sure it is clean and free of any stains or dirt. |
| Fabric Dye | Choose a dye suitable for natural fibers like cashmere. |
| Salt or Vinegar | Depending on the dye, you might need a fixative like salt or vinegar. |
| Large Pot or Stainless-Steel Sink | For soaking and dyeing. |
| Stirring Utensil | To ensure even dye distribution. |
| Gloves | To protect your hands from dye. |
| Protective Apron | To protect your clothing. |
Hand paint method step-by-step guide
Here are the techniques and steps.
Prepare the Cashmere
Embark on your “dye cashmere” journey by thoroughly preparing the delicate Kashmir goat fibers. Ensure that the clean, delicate garments are free from any stains or dirt. This step sets the foundation for a successful hand-dyeing method.
Choose the Dye
The choice of fabric dye is critical in the hand-dyeing technique when you dye cashmere. Opt for a high-quality dye suitable for natural fibers like cashmere. Tintex Fabric Dye, renowned for its vibrant and lasting colors, can be an excellent choice for enhancing the beauty of your cashmere garments.
Soak Cashmere
Submerge the cashmere in a lukewarm water bath, ensuring an optimal setting for dyeing cashmere. This step promotes uniform absorption of the dye by the Kashmir goat fibers, harmonizing with the delicate hand-dyeing method to preserve the fabric’s intrinsic delicacy.
Prepare Dye Bath
As you embark on the hand-dyeing process, prepare the dye bath using Tintex Products, considering the specific dyeing technique. Depending on the dye, introduce a fixative such as salt or vinegar to enhance color retention during the dye application.
Dye Application
With your dye bath prepared, expertly hand-dye the cashmere using precise movements. Executing the hand-dyeing technique guarantees a uniform distribution of color across the fabric. Navigate the dyeing solution carefully to safeguard and enhance the exquisite texture of the Kashmir goat fibers, ensuring a masterfully crafted result when you dye cashmere
Monitor and Stir
Throughout the dye application, attentively monitor and stir the cashmere in the dye bath. This meticulous approach is crucial for achieving a flawless and harmonious result when you dye cashmere. The combination of the chosen fabric dye and the hand-dyeing method requires careful attention to detail.
Rinse
After the desired color saturation is achieved, gently remove the cashmere and rinse it under cold water. This crucial step, reminiscent of an ice-dyed wool coat’s care, helps eliminate excess dye, setting the stage for the subsequent fixative process.
Fix the Color
To fortify the vibrancy of your hand-dyed cashmere, meticulously follow the dye package instructions for fixing the color. Incorporating a fixative into the dyeing solution ensures the enduring brilliance of the beautiful hues, mirroring the meticulous care applied when tinting an ice-dyed wool coat. When you dye cashmere, attention to fixing processes contributes to a lasting and stunning outcome.
Final Rinse
Give the cashmere a final rinse, mirroring the meticulous approach taken when dealing with clean delicate garments. This step ensures the removal of any residual dye or fixative, leaving the hand-dyed fabric in its purest and most vibrant form.
Dry
Lay the hand-dyed cashmere flat on a clean surface for optimal drying, mirroring the meticulous care given to an ice-dyed wool coat. This crucial step, executed with expertise, preserves the fabric’s integrity and shape, marking the culmination of the artful journey in dyeing cashmere.
Tie-dyeing method step-by-step guide

Here are the techniques and steps.
Prepare the Cashmere
To start the process of dyeing cashmere, it’s important to make sure that your delicate fabric is completely clean. Follow the time-honored tradition of washing these Kashmir Goat fibers with care, just as you would handle an ice-dyed wool coat, to create a pristine canvas for your artistic endeavor.
Choose the Dye – Tintex Fabric Dye:
Elevate your dyeing experience with Tintex Fabric Dye, a top-tier choice for cashmere dyeing. With a palette of rich colors, Tintex Products ensures the vibrancy and longevity of your tie-dyed creations, transforming your hand-dyed cashmere into wearable works of art.
Tie the Cashmere
Embrace the creativity of tie-dyeing by binding sections of your cashmere with rubber bands or strings. This hand-dyeing method allows you to experiment with various tying techniques, from spirals to crumples, each yielding unique patterns reminiscent of an ice-dyed wool coat’s captivating allure.
Prepare Dye Solution
Craft a dyeing solution using Tintex Fabric Dye, blending colors as if painting on a canvas. This dyeing technique allows for dynamic results, transforming lukewarm water into a medium for your artistic expression.
Apply the Dye – Hand Dye Cashmere
With gloved hands, indulge in the application of the dye to your tied cashmere. Picture your hands as the brushes of an artist, each stroke bringing life to the fabric. Hand-dyeing cashmere allows for a personal touch, making each piece truly one-of-a-kind.
Wrap and Let Set
Wrap your creation in plastic, letting the dye set in its own time. This patience mirrors the care taken when preparing clean, delicate garments, ensuring the colors penetrate and bond with the cashmere fibers.
Rinse and Unbind
As the dye sets, carefully unveil your tied masterpiece. Rinse under cold water, just as you would with an ice-dyed wool coat, revealing the intricacies of the tie-dye pattern.
Fix the Color
Follow the dye package instructions to fix the color. This critical step ensures the longevity of your hand-dyed cashmere, much like the meticulous care given to tinting an ice-dyed wool coat.
Final Rinse
Give your tie-dyed cashmere a gentle final rinse. This step, akin to handling clean delicate garments, removes any residual dye or fixative, leaving your creation ready for wear.
Dry
Lay your tie-dyed cashmere flat to dry, preserving its shape and allowing the tie-dye pattern to unfold. Revel in the satisfaction of turning ordinary cashmere into a personalized masterpiece through the artful and joyful process of tie-dyeing.
Tips for dyeing cashmere
Choose Quality Dyes: Select fabric dyes specifically designed for natural fibers like cashmere, ensuring vibrant and lasting results.
Test in Small Areas: Conduct a test on a small, inconspicuous area before dyeing the entire garment to check color compatibility.
Follow Care Instructions: Adhere to the care instructions provided by the dye manufacturer for optimal results.
Pre-Wash Cashmere: Clean the cashmere garment before dyeing to remove any residues and enhance dye absorption.
Use Lukewarm Water: Use lukewarm water when preparing the dye solution and soaking the cashmere for even dye distribution.
Protect Your Hands and Clothing: Wear gloves and a protective apron to prevent skin and clothing stains from the dye.
Apply Dye Evenly: Strive for even dye application, whether tie-dyeing, hand-painting, or using other techniques.
Experiment with Techniques: Explore different dyeing techniques, such as tie-dyeing or hand-painting, for unique patterns.
Fix the Color Properly: Follow dye package instructions to ensure proper fixing, minimizing color bleeding and increasing colorfastness.
Be Patient During Setting: Allow the dye to set for the recommended time to achieve vibrant and long-lasting colors.
Protect Surfaces: Use plastic covers or work in a dye-friendly area to protect surfaces from staining.
Rinse Thoroughly: Rinse the dyed cashmere thoroughly under cold water until excess dye is removed.
Handle with Care: Treat the dyed cashmere gently during washing and rinsing to preserve its softness and shape.
Avoid Excessive Agitation: Minimize agitation during washing and rinsing to prevent unnecessary stress on the fibers.
Dry Flat: Lay the dyed cashmere flat to dry to maintain the garment’s shape and prevent distortion.
Frequently Asked Questions
How to dye cashmere with rit?
To dye cashmere with Rit, pre-wash the garment, follow Rit’s dyeing instructions for the dye bath, rinse thoroughly, and adhere to package instructions for fixing and drying.
How to dye cashmere yarn?
Dye cashmere yarn by preparing a dye bath, immersing the yarn, following specific dye instructions, rinsing thoroughly, and allowing it to dry.
How to do a tie-dye cashmere sweater?
Create a tie-dye cashmere sweater by tying sections with rubber bands, applying fabric dye, letting it set, rinsing, fixing the color, and drying flat.
Can you dye cashmere at home?
Yes, you can dye cashmere at home using suitable fabric dyes and following proper dyeing techniques.
Final Thoughts
If you’re looking to add some personal flair to your wardrobe, consider dyeing your cashmere clothing. By dyeing your cashmere, you can create unique and vibrant colors that are sure to stand out. Whether you choose to tie dye or hand-paint, using quality dyes like Tintex Fabric Dye can help ensure the best results. Just be sure to follow the specific dye instructions, handle the delicate fibers with care, and embrace the artistic possibilities to transform your cashmere into a one-of-a-kind masterpiece.